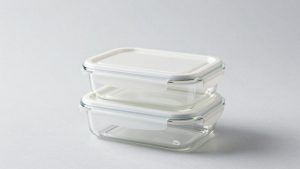
Choose 8 oz food storage containers with lids for snack portions, dips, and small leftovers. Lightweight plastic works well in a lunch bag, while a wide glass dish is easy to eat from at home. For liquids that will travel, check for an explicit leakproof claim. Size up if you need to pack a full cup with room to stir.
When 8 oz food storage containers with lids make sense
An 8-fluid-ounce container is a practical size for a side dish, a small serving of leftovers, or a batch of individually portioned snacks. Start with the amount you actually serve and how you eat it. Food that needs toppings, mixing, or room under the lid may fit better in the next size up.
| What you pack | Useful design | What to check before buying |
|---|---|---|
| Dry snacks or cut fruit | Lightweight container with a simple lid | Opening effort and fit in the lunch bag |
| Salsa, dressing, or a wet side for travel | Closure explicitly described as leakproof for liquids | Transport instructions and lid assembly |
| Yogurt with toppings | Wide container or separate topping cup | Clearance for stirring and a spoon |
| Small leftovers eaten at home | Wide, shallow dish | Body and lid instructions for washing and reheating |
| Individual freezer portions | Freezer-rated container with a stackable base | Fill guidance, lid fit, and labeling space |
| Party dips or food to send home | Identical tubs with interchangeable lids | Complete container count and intended reuse |
Check how much food fits under the lid
Eight U.S. fluid ounces equal one U.S. customary cup by volume. The usable portion depends on where the lid sits and how much clearance the food needs. A dish that holds a cup of water to the rim may feel crowded when filled with a cup of yogurt you want to stir or a cup of berries that rise above the rim.
If you already have a similar container, set it on a level surface and pour in your usual serving from a measuring cup. Fit the lid and open it again. If the lid touches the food or you cannot scoop without spilling, you have a reason to buy a larger size. For a container you have yet to order, look for an explicit capacity per base and check whether the manufacturer identifies a maximum fill line.
Capacity describes volume. Eight ounces on a kitchen scale describes weight. A scale is helpful for portioning cheese, nuts, or cooked meat by weight, but the space those portions occupy depends on the food and how it is cut or packed. If you plan to fit eight ounces by weight, measure the portion in a cup before deciding what container volume to buy.
Decide what belongs in a smaller or larger container
A full set of one-cup containers makes sense when several foods in your routine use that same footprint. If you mainly pack a spoonful of dressing or a small handful of nuts, smaller cups save room in the bag. A larger container earns its space when you need to add toppings, toss a side, or keep a full serving upright.
Try mapping three lunches you already pack. If each has grapes, crackers, or a few bites of leftovers that you want to keep separate, one-cup containers may cover most of the work. If lunch is usually a grain bowl with a small serving of dressing, use a larger bowl for the meal and a smaller cup for the dressing. You can also keep crunchy toppings in their own cup to preserve their texture until lunch.
Measure irregular foods by the space they need in the container. A few apple wedges might fit by volume but catch under a narrow rim or stand too high when stacked. A wide base lets you lay them flatter. The same shape helps when you want to lift a small slice of cake out intact.
Choose a material and shape for your routine
Decide where the container will spend most of its time. A lunch bag favors low weight and a footprint that fits around an ice pack. At home, a wide dish can go from the fridge to the table when the model’s care instructions allow it. For a crowded freezer, exterior dimensions matter as much as capacity.
Use plastic when weight and matching lids matter
Plastic is a practical choice for packing several small servings at once, especially if you carry your lunch on foot or send containers to school. Compare the lid styles, how easily the empty bases nest, and whether you can replace a lost lid. A small set of identical tubs can be easier to keep in rotation.
Thin deli-style tubs suit portioning and sharing when the manufacturer permits the intended use. A more rigid reusable container may make sense when you expect to open and wash it throughout the week. Press lightly around the rim of a sample when you get it. If the base flexes enough to make the lid awkward to seat, pick a sturdier option for a bag that gets crowded.
If tomato sauce stains or lingering food odors would bother you, consider keeping one set for strong-flavored foods or using glass for those portions. Check the care instructions before assuming repeated dishwasher or microwave use is appropriate for a specific plastic tub. A container sold for serving a cold dessert can look much like one marketed for meal prep, even when their care instructions differ.
Use glass when you eat straight from the dish
Glass makes sense for a small serving you plan to scoop or eat at home, particularly when you want to see the contents and prefer a rigid dish. Check the weight if you also plan to carry it, and compare the care instructions for the base and the lid before you plan to reheat leftovers in the same dish.
A round dish with a shallow curve gives a spoon an easy path around the edge. A square glass dish can make better use of a shelf, depending on how far the rim and lid extend beyond the base. Think about where you grip it with a mitt or towel if the manufacturer’s instructions permit heating. A dish with little space around the rim can be awkward to lift when hot.
Store glass where you can pick up each dish without dragging it across another. When shopping for replacements, check the base model or the lid part number. Two glass dishes with the same advertised capacity can have different rims, so a lid from another set may sit on top while failing to engage properly.
Match the opening and base to the food
A wide opening helps when you fill a container with chunky food, reach in with a fork, or scrape the last spoonful out. A taller cup can make sense in a lunch bag with limited floor space. Compare the actual exterior measurements with the shelf, drawer, or bag where the containers will live.
If you store food side by side, measure the widest part of the closed container, including latches. If you stack filled containers, measure the total height and leave room to lift the top one clear. For an insulated lunch bag, check the inside dimensions where it narrows near the zipper. Also account for the space your ice pack and main dish already take up.
Nesting describes how empty bases fit together. Stacking describes how closed containers sit on one another. If both matter, look for photos of each arrangement. A tall stack of empty tubs may need only a small patch of shelf while the same tubs, filled and closed, can take up a full row in a refrigerator drawer.
Choose a lid for the way the container travels
A lid can close securely in the refrigerator and still be a poor fit for a liquid carried on its side. If the contents could spill, look for a liquid-specific leakproof claim for the exact container and follow any stated orientation limits. For crackers or dry snacks, prioritize a lid you can open without a struggle.
How to check the seal on 8 oz food storage containers with lids
Start with the manufacturer’s wording and look at how the lid closes around the rim. A gasket, screw top, or set of latches tells you how the closure works. The instructions for the exact model tell you what it is designed to handle, including whether liquids can travel and how the lid must be assembled.
Once you own the container, do a water check over the sink within the manufacturer’s stated use. Add water below the fill line, wipe the outside dry, and close the lid as directed. If the model allows sideways transport, hold it on its side over the sink and check the seam for moisture. Repeat after cleaning and reassembling a removable seal if you suspect it is seated incorrectly.
Treat the water check as a way to spot a poor fit before using the container. A short check at home covers the conditions you tried. A packed bag adds bumps and pressure from other items. If your lunch bag forces a tub sideways and the manufacturer specifies upright storage, choose a different shape or a model designed for that position.
Balance opening effort and cleaning
A small lid should fit the person opening it as well as it fits the container. A tab with space for a finger can be helpful for school lunches. Multiple latches can suit an adult who wants a clearly engaged closure, provided the tabs can swing freely and the lid is easy to reassemble after washing.
Have the person who will use the container try it at home with a small amount of food inside. Watch whether they can grip the base, lift a corner, and set the lid back on squarely. An abrupt release can send crackers across a table or splash a wet side dish. If the opening action is difficult, reserve that set for home or choose a lid with a larger tab.
Look at the underside of the lid before committing to a large pack. A deep channel or removable gasket adds a place to inspect after washing. If the manufacturer says the gasket is removable, follow its instructions and allow parts to dry before reassembly. If a fitted seal is hard to clean, a simpler lid can be a better everyday choice for dry snacks.
Check freezer, microwave, and dishwasher compatibility
Check the body and lid separately for the appliances you use. The product page or care sheet should specify which parts can go in the freezer, microwave, or dishwasher and any limits that apply. Keep those instructions handy if you buy several similar sets with different materials or closure designs.
For freezer portions, choose a freezer-rated model and follow its fill guidance for foods that expand as they freeze. A place to write the contents and date helps distinguish similar portions once the container is frosted. For leftovers at home, shallow containers are useful for dividing larger batches into smaller portions for cooling in the refrigerator.
For microwave use, choose a body labeled microwave-safe and follow the manufacturer’s instructions on removing or venting the lid. A glass base and a plastic lid can have different heating limits even when they ship together. If the care sheet only addresses storage and washing, use a separate microwave-safe dish for reheating. Keep glass away from temperature changes the manufacturer prohibits.
If you rely on a dishwasher, check whether the body or lid must go on the top rack and whether the care instructions restrict heated drying. Small lids can shift if they are placed loosely. Use a rack position that holds them securely and follows the appliance and container instructions. If an everyday set requires handwashing several small parts, factor that time into the purchase.
If you freeze ingredients for recipes, check whether your usual portion releases in one piece. A shallow container can make it easier to remove and break up a portion of stock or sauce when the manufacturer allows that use. A narrow jar may be easier to pour into, but its shoulders can make a solid portion harder to remove. Choose the shape based on whether you plan to thaw the contents in the container or transfer them while frozen.
Set a budget by counting containers you can use
Compare prices by the number of complete containers in the size you need. A piece count may include every base and lid, and an assorted set may provide only a few one-cup containers. Count the portions you need between washes, then check whether identical lids or available replacements would justify spending more.
Compare the cost per usable container
Divide the delivered cost by the number of matching bases and lids you expect to use. If you want several sizes and will use the entire set, the wider assortment may be worthwhile. If you’re building a week’s worth of one-cup portions, compare each pack based on how many of that size it adds to your rotation.
For example, an eight-piece set listed as four bases plus four lids gives you four closed containers. If two of those bases are smaller than one cup, the set gives you two containers for the job at hand. A four-count pack of identical one-cup bases with matching lids gives you four. Treat an example like this as a count comparison and use the actual delivered prices when making your decision.
Use your wash routine to choose a pack size. Two containers packed each weekday and washed every evening require fewer bases than two containers packed each weekday and washed at the end of the week. Count any portions that will stay in the refrigerator or freezer at the same time. If tubs regularly go home with guests, keep those separate from the set you depend on for lunch.
Pay for the feature you use most often
If you pack liquid sides twice a week, a documented closure and a lid you can clean are worth comparing before decorative details. If you store and serve at home, a wide opening, a shape that fits your shelf, and care instructions that match your routine can matter more than a more elaborate lid.
For gifts, parties, or meals you share, estimate how many containers will come back before buying a large set with fitted lids. An inexpensive set of matching tubs may suit that job if the manufacturer supports the intended food and temperature. For freezer portions you keep at home, standardized lids and a stable closed stack may make a smaller set easier to live with.
When you are unsure about the closure or footprint, start with the smallest pack that lets you try both. Fill it with your usual snack, place it alongside the items you already carry, and wash it the way you would on a weekday. If you discover the lid clips block an adjacent container or the base is too tall for your drawer, you can change shape before committing to a bigger set.
Conclusion
Choose a one-cup set that fits your actual portions, your storage space, and the way you wash it. For liquids that travel, verify the lid’s leakproof claim and any orientation limits. Count complete bases and lids in the size you need, and choose a larger dish when toppings or stirring require extra room.
More from Amazon
Programs that pair well with the guide above. Offers and eligibility are set by Amazon and may change.
Set up recurring deliveries of everyday items on eligible products. Terms and savings are set by Amazon.
Explore Subscribe & SaveCollect the home and kitchen items you want in one registry that guests can shop from.
Create a wedding registryFree shipping on eligible items, Prime Video and more. Eligible new members can start with a free trial.
Start a Prime free trialAudiobooks and podcasts to listen to on the go. Eligible new members can start with a free trial.
Try Audible freeAs an Amazon Associate we earn from qualifying purchases.