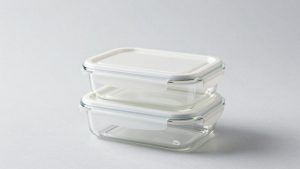
Choose 6 oz glass containers with lids for a small snack, a side of dip, or an individual dessert. A shallow lidded cup is easy to scoop from at home. For sauce in a lunch bag, buy a jar and cap combination rated leakproof. If you measure a full ¾ cup before adding toppings, step up to an 8-ounce dish.
What fits in 6 oz glass containers with lids?
Six U.S. fluid ounces equal ¾ cup, 12 tablespoons, or about 177 milliliters. That conversion describes volume. Weighing six ounces of yogurt, nuts, or cheese tells you how heavy the food is. Check the volume of your usual portion before deciding whether it fits below a lid.
Measure the portion as you actually pack it
Test the serving with any topping or garnish you add before closing the dish. Chopped fruit can leave gaps or stick up at an angle, and a few berries can crowd a yogurt cup already filled nearly to the rim. Measure a typical serving and the bulkiest serving you pack regularly.
If you already own a small covered dish, fill it with the portion you normally pack. Lower the lid into place and see whether the underside touches the food. Open it and try stirring or scooping with your usual spoon. For a cup that looks roomy on the outside, thick glass walls and a recessed lid can make the working space smaller than you expect. Use a liquid measuring cup and water to check capacity if the dish has no markings, then measure the clearance separately with the food itself.
For a snack you pack by weight, use the scale to portion the food first, then transfer it to a measuring cup or trial dish. The result matters more than converting a weight on a package to fluid ounces. For example, two equal-weight portions of dense dip and loose pretzels may occupy very different amounts of space. If the pretzels need the larger size and you pack them most days, buy for that serving.
When 4 or 8 ounces makes a better purchase
Choose around 4 fluid ounces if you usually carry only a few spoonfuls of dressing or a small portion of dip and want to save room in your lunch bag. Move up to 8 fluid ounces when your regular serving reaches ¾ cup before toppings, or you need clearance to stir at the table.
Compare your usual serving to the size before buying a set. A 4-ounce vessel has a nominal capacity of ½ cup and an 8-ounce vessel holds a nominal 1 cup. That puts the 6-ounce size in a useful middle position for a modest snack, but a 2-tablespoon dressing portion leaves most of it empty. At the other end, a measured ¾ cup of applesauce in a 6-ounce dish can leave little practical clearance for a lid that dips below the rim.
The next size up also makes sense if you want the same container to do two jobs. A larger cup can hold yogurt and the toppings you mix in at lunch. If you prefer granola to stay crunchy, a separate little container can be worth the extra lid to wash. For snacks you eat in layers or serve directly from a shallow cup, the smaller size may already do the job.
Pick a shape for serving, scooping, or carrying
A shallow custard cup gives a spoon room to move and lets you see how much dip or dessert is left. A straight-sided jar can sit upright in a narrow lunch bag pocket. Measure the mouth and the width with the lid on, because each dimension solves a different fit problem.
| What you pack or serve | Shape and closure to look for | What to check |
|---|---|---|
| Pudding or mousse at home | Shallow cup with an easy-to-lift cover | Room above the dessert and a spoon-friendly edge |
| Hummus or thick dip | Wide-mouthed cup or straight-sided jar | Space to scoop without scraping your knuckles |
| Thin dressing that travels | Jar or small container rated leakproof with the supplied lid | Exact cap or seal required for the claim |
| A handful of toppings for a packed lunch | Small jar or cup with an easy-open lid | Whether 4 ounces would free up bag space |
| Berries or yogurt with mix-ins | Wide opening with clearance for the toppings | Whether you can stir after opening |
When a custard cup works better than a jar
Choose a lidded custard cup when you portion food into several small servings and eat it with a spoon at home. Its open shape is handy for pressing a topping into yogurt or scooping hummus. When shopping for a set, confirm that every cup comes with a cover.
The Anchor Hocking 6-Ounce Custard Cup Set with Lids, model 80381L20, is an example of the shallow format. The manufacturer lists four 6-ounce glass cups with four clear lids. It also lists a separate four-cup set, model 81672L20, that contains cups alone. Check the model or the contents list before ordering if you want to prep several desserts and cover each one. Buy on the assumption that the lid is for the uses the manufacturer actually lists.
If you serve dessert from the same cup, consider the shape at the bottom as well as the width at the top. A spoon that follows the curve of the cup makes it easier to finish a thick pudding. For a layered dessert, measure the height of your toppings after assembly. If the cover would flatten whipped cream, chill the base in the covered cup and add the topping before serving, or choose a larger dish.
When a straight-sided jar is easier to pack
A straight-sided jar makes sense when you need the container to stand in a narrow spot or want the opening to guide ingredients as you pour. Check the actual mouth diameter, especially if you use a tablespoon to fill the jar or want to eat directly from it with a spoon.
One packaging example is the Uline Clear Straight-Sided Glass Jar, model S-25164. The listing specifies 6 fluid ounces, a 2⅛-inch opening, and a 63/400 cap size, with caps sold separately. Use those details to see what a listing can tell you about handling and compatibility. A jar sold in bulk with separate caps suits a different purchase than a ready-to-use four-pack of lidded dishes, even when the glass bases have the same labeled capacity.
If you pour from a larger mixing bowl, compare the jar opening with the width of your ladle or funnel. A funnel that sits securely makes it easier to keep the threads clean while filling several jars. For chunky salsa, choose a wider opening so you can transfer both the solids and liquid without pushing pieces through a narrow neck.
Check the inside width of your bag pocket near the bottom as well as at the opening. A jar can enter the pocket and still catch on the seam, leaving the lid above the zipper. If you pack several small servings together, compare the space taken up by the complete group. Four low cups might spread out across the bag floor, while four upright jars can stand closer together if the bag is tall enough.
Choose the closure for the food you carry
For upright refrigerator storage, prioritize a lid you can open without jostling the food. For dressing or loose sauce that travels, check the leakproof claim on the exact jar and lid combination. The same glass body can come with several closures intended for different jobs.
How to compare caps on 6 oz glass containers with lids
Check whether the cap is included, what type of seal it uses, and whether the claim applies to that cap on that jar. A thread code helps you order a matching closure. The seal design and the supplier’s instructions tell you what you can expect when the jar tips in a bag.
On the Uline S-25164 listing, the supplier describes the combination with its compatible metal cap as leakproof and airtight and distinguishes it from the combination with the plastic cap. That is a useful example of why the cap selection matters. It applies to the listed combination. Other metal or plastic lids can have different liners and different instructions, even if the threads appear to fit.
With a model rated for liquids, try a small amount of cool water over a sink to see whether your new closure seats evenly. Follow the specified fill and closing directions and gently tilt the jar. If you see water near the rim, check for a trapped crumb, a cross-threaded lid, or a seal that has shifted. That brief check applies to the assembled jar you used and the conditions you tried. Follow the supplier’s use limits when you pack lunch and keep the vessel upright where practical.
What matters for cleaning a small lid
Look closely at how the lid comes apart and whether you can reach the area where food touches it. A thick dip can lodge around a rim or gasket. Choose a closure you can clean and dry thoroughly with the tools you already use, especially if several cups will be washed together.
If a gasket is designed to come out, follow the instructions for removing and reinstalling it. Check that the gasket lies flat around the entire opening before carrying liquid again. A design that leaves the seal permanently in place can be convenient if the exposed surfaces are easy to reach. Review the instructions for dishwashing the cap and its liner separately from the base, and consider whether the lid is easy to grasp with wet hands.
A wide mouth can save as much effort as a simple lid. When you wash a narrow jar by hand, check whether your sponge can reach the bottom and the area below the neck. If you use a brush, see whether its head fits without forcing it. For a set you plan to fill with sticky food every week, the seconds saved opening and cleaning each jar can matter more than a small difference in purchase price.
Check care instructions for the glass and lid
Read the use instructions for the exact base and closure if you want to warm, freeze, or wash the container in an appliance. Treat each component separately. A covered dish that suits serving and refrigeration can have very different instructions for the glass, cap, and liner.
Match the appliance to the specific part
Look for microwave approval on the component you intend to heat and follow any directions to remove or vent the lid. Keep metal caps out of the microwave. If you buy a custard cup to bake individual desserts, confirm the maker’s oven instructions for that specific glass cup.
An oven rating and a freezer rating tell you about separate uses. If you move a dish between those environments, follow the exact directions for temperature changes. Some manufacturers call for thawing before reheating. If you only chill pudding or pack a side of dip, choose a lid and shape that fit those jobs and save the appliance requirements for dishes you actually heat.
Consider how you will handle the cup when it comes out of the microwave. A short, smooth-sided cup can be awkward to grip, especially when several dishes share a turntable. Check for enough room around it to pick it up with a dry potholder when needed. If the container you like is intended for cold storage only, transfer food to a microwave-safe dish before warming.
Leave room when freezing small portions
For a sauce or purée you plan to freeze, look for a freezer-rated container and check the maker’s fill guidance before portioning. Expansion space can make the usable amount smaller than the labeled capacity. Size up if your serving reaches the prescribed limit before it is all in the dish.
Think about how you use each portion later. If you add just a few tablespoons of sauce at a time, smaller freezer-rated containers may let you thaw what you need more conveniently. If you always use ¾ cup for a recipe, choose a container that can hold the full serving within its freezer fill guidance. Label each portion with the amount so you can pull the right one without guessing from how much of the glass looks full.
For countertop storage, distinguish an everyday jar for dry toppings from a jar and lid intended for home canning. A lid that closes securely is useful for short-term storage and transport. Use jars, lids, and procedures recommended for home canning if your goal is to preserve food that way. For regular fridge snacks, buy the opening, lid style, and size that fit that job.
Compare the cost per covered container
Count the usable glass bases and compatible lids before comparing prices. An eight-piece set may provide four portions if each lid counts as one piece. If a listing sells caps separately, include the cost of enough compatible caps and any shipping charges for both items.
Buy enough matching cups for one full prep session
Start with the number of portions you prepare at one time and add spares only if you will use them. Four covered cups make sense if you prepare four individual desserts. A larger set can help if you fill containers for several people and some lids are usually still in the dishwasher.
Compare the delivered price per complete vessel for the units you expect to use. For example, if a hypothetical four-cup set with matching lids costs $16 delivered, each covered cup costs $4. If a hypothetical case of 24 jars with separately ordered compatible caps costs $48 delivered, that works out to $2 per assembly when you use all 24. If your project only needs six and the rest will sit in a box, the case is a $48 purchase for six usable servings right now. Add any tax and delivery to both options on the same basis.
Look for a replacement lid or cap part number if you expect to reuse the dishes for a long time. Even when a replacement is listed, compare its delivered price with the cost of buying another complete dish. If several people take lunch from the same cupboard, matching bases that share a confirmed lid can reduce the number of loose parts you sort in the morning.
Storage space can also decide the bundle size. Measure how high the empty cups stack, where you will put the lids, and how much room the filled portions take in the fridge. If each dessert needs to stay level and the lids do not support stacking, count the actual shelf area needed for a full batch. A smaller purchase makes sense if your next prep session would exceed the space you have.
Conclusion
Buy a covered 6-ounce cup for a small snack or dessert you serve upright, and choose an explicitly leakproof jar and cap for sauce that travels. Check that the set includes a usable lid for each base. Move up to 8 ounces if your measured ¾-cup portion needs space for toppings or stirring.
More from Amazon
Programs that pair well with the guide above. Offers and eligibility are set by Amazon and may change.
Set up recurring deliveries of everyday items on eligible products. Terms and savings are set by Amazon.
Explore Subscribe & SaveCollect the home and kitchen items you want in one registry that guests can shop from.
Create a wedding registryFree shipping on eligible items, Prime Video and more. Eligible new members can start with a free trial.
Start a Prime free trialAudiobooks and podcasts to listen to on the go. Eligible new members can start with a free trial.
Try Audible freeAs an Amazon Associate we earn from qualifying purchases.