Key takeaways
- Filling the container completely, especially with soup, sauce, or cooked grains.
- Freezing food while it is still piping hot.
- Moving a container directly from the freezer to a hot oven, stovetop, or sink of warm water.
- Putting a frozen container on a hot countertop or setting a hot container on a cold, wet surface.
- Stacking containers before their contents are solid.
- Using a container with a chip, crack, deep scratch, cloudy stress mark, or damaged rim.
- Forcing a rigid lid onto food that has expanded.
- Dropping or sliding containers onto a freezer shelf.
- Assuming all glass food containers have the same oven, freezer, or microwave limits.
Glass meal prep containers usually crack in the freezer because of thermal shock or pressure—not because the freezer is “too cold” by itself. A hot container placed on a frozen shelf can contract unevenly, while food that expands as it freezes can push hard against the glass and lid. Dropping a chilled dish onto a shelf, stacking containers before they are frozen, or using a chipped container makes failure more likely.
The safest approach is simple: use containers labeled freezer-safe, let food cool before freezing, leave enough headspace, and avoid sudden temperature changes. This guide explains how to stop glass meal prep containers cracking in freezer storage in 2026, with practical steps for portioning, cooling, freezing, thawing, and reheating.
As an Amazon Associate we earn from qualifying purchases at no extra cost to you. Product prices and availability are accurate as of the date shown and are subject to change.

What You Need
| Item | Why | Optional? |
|---|---|---|
| Freezer-safe glass containers | Tempered or borosilicate glass designed for freezing is less vulnerable to ordinary temperature changes. Check the manufacturer’s instructions rather than assuming every glass dish is freezer-safe. | No |
| Matching, freezer-safe lids | A lid helps prevent freezer burn, but it should not be forced tightly against expanding food. Inspect the seal and vent instructions before freezing. | No |
| Measuring cup or kitchen scale | Useful for leaving consistent headspace and dividing meals evenly. A 30-ounce container holds about 887 milliliters, but it should not be filled to the rim. | Yes |
| Cooling rack or heatproof tray | Allows warm containers to cool on a stable surface instead of transferring heat directly to a cold countertop or freezer shelf. | Yes |
| Freezer labels and marker | Labels make it easier to use older meals first and record the freezing date and reheating instructions. | Yes |
| Flat, level freezer space | A level shelf reduces tipping, impact, and uneven pressure while containers freeze. | No |
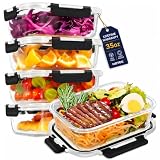
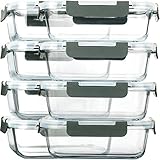
For reference, common 30-ounce sets such as the M MCIRCO 8 Pack Glass Food Storage Containers with Lids and the KOMUEE 10 Packs 30-ounce Glass Meal Prep Containers with two compartments are often priced around $35 to $45 per set; the listed price for each is $39.99. The important buying criteria are the freezer-safe rating, intact glass, secure lids, and a shape that fits your freezer—not simply the number of pieces.
Step-by-Step
1. Check the glass and instructions (2 minutes)
Before filling a container, look for chips, hairline cracks, scratches concentrated around corners, or damage to the rim. Do not freeze food in a container with any defect. Read the use symbols or product instructions for freezer, microwave, oven, and dishwasher limits. Some containers are freezer-safe but cannot go directly from freezer to a hot oven.
Also check whether the lid is freezer-safe. Plastic lids can become brittle when cold, and some should not be placed in a microwave. If the lid has a steam vent, follow the manufacturer’s instructions rather than sealing or opening it by force.
2. Cool the meal before filling (30 to 60 minutes)
Do not move a hot pan or freshly cooked meal straight into a glass container and then into the freezer. Let the food stop steaming first. For faster cooling, divide a large batch into shallow portions in a heatproof dish, stir occasionally, and place the dish on a cooling rack.
For food safety, refrigerate perishable food within two hours of cooking, or within one hour when the room is above 90°F. A refrigerator should be at 40°F or below. You do not need to wait until food reaches room temperature for hours; the goal is to avoid putting very hot food against cold glass or into a crowded freezer.
3. Leave room for expansion (1 minute per container)
Water-based foods expand as they freeze. Soups, stews, sauces, cooked grains, beans, and vegetables need more room than dense foods such as meatloaf. As a practical starting point, leave at least 1 inch of empty space above liquid-heavy meals. For smaller portions, leaving roughly 10% to 15% of the container empty is a useful guide.
Keep food below the shoulder or narrowing point of the container, where possible. Never fill glass to the rim or allow a solid block of food to press tightly against the lid. If you are unsure, freeze a test portion with extra space before preparing a full batch.
4. Seal without forcing the lid (1 minute)
Wipe the rim clean so the lid can sit evenly. Close it according to the container’s design, but do not clamp down harder than necessary or use a lid that is warped. A tight seal protects food quality; it does not make an overfilled container safer.
If the manufacturer recommends leaving a vent open during part of the freezing process, follow that direction. Otherwise, close the lid normally after leaving headspace. Label the meal with its name and date before placing it in the freezer.
5. Pre-chill when the meal is still warm (30 to 60 minutes)
If the food is warm but no longer steaming, place the sealed container in the refrigerator first. A short pre-chill reduces the temperature difference between the glass and freezer air. Keep the container upright and on a tray to catch leaks.
Do not put a warm glass container directly on top of frozen food. The heat can soften or partially thaw nearby food, while the uneven temperature change increases stress on the container.
6. Freeze containers in a single layer (4 to 8 hours)
Set containers on a flat shelf with space between them for cold air to circulate. Leave them undisturbed until the contents are solid, usually at least four hours for a shallow meal and longer for a deep, liquid-heavy portion. Keep the freezer at 0°F or below.
Do not stack unfrozen containers. A container can tilt, its lid can be pushed out of alignment, or its base can be exposed to uneven pressure. Once fully frozen, stack only if the containers are designed for stacking and the pile remains stable.
7. Thaw gradually (8 to 24 hours)
The safest routine is to move the container from the freezer to the refrigerator for about 8 to 24 hours, depending on the portion size. Place it on a plate or tray in case the lid loosens or condensation forms.
Avoid setting a frozen glass container on a hot stovetop, placing it in hot water, or pouring boiling liquid into it. Those rapid changes can cause thermal shock even if the container survived freezing.
8. Reheat carefully (5 to 10 minutes)
Before microwaving, confirm that the glass is microwave-safe and remove or vent the lid as directed. Reheat in short intervals, such as 60 to 90 seconds, stirring between intervals when practical. Let the container rest for a minute before handling.
Never use a frozen or visibly chilled glass container in a preheated oven unless the manufacturer specifically permits that transition. If oven reheating is allowed, follow the stated temperature limit and place the dish on a dry, room-temperature surface afterward.
Mistakes to Avoid
- Filling the container completely, especially with soup, sauce, or cooked grains.
- Freezing food while it is still piping hot.
- Moving a container directly from the freezer to a hot oven, stovetop, or sink of warm water.
- Putting a frozen container on a hot countertop or setting a hot container on a cold, wet surface.
- Stacking containers before their contents are solid.
- Using a container with a chip, crack, deep scratch, cloudy stress mark, or damaged rim.
- Forcing a rigid lid onto food that has expanded.
- Dropping or sliding containers onto a freezer shelf.
- Assuming all glass food containers have the same oven, freezer, or microwave limits.
How Often
Use the cooling, headspace, and gradual-thawing routine every time you freeze a meal. Inspect containers before each use, especially after dishwasher cycles, freezer stacking, or accidental impacts. Wash and fully dry containers after each meal. Check lids monthly for warping, loose seals, or splits, and reorganize the freezer whenever containers begin leaning or pressing against one another.
For best quality, label meals with the freezing date and rotate older portions forward. Freezing keeps food safe when the freezer stays at 0°F, but texture and flavor generally decline over time. A practical household rotation is to use most prepared meals within two to three months unless a tested recipe or food-safety guidance recommends otherwise.
When to Call a Pro or Replace
Glass meal prep containers are not realistically repairable. Replace one immediately if you see a crack, chip, sharp edge, glass flake, deep scratch, or a mark that spreads from a corner or rim. Do not tape it, glue it, or continue using it for cold storage; adhesives are not a safe fix for food-contact glass or thermal stress.
You do not need to call a professional for an ordinary freezer crack. If glass has broken inside a freezer, unplug or secure the appliance as appropriate, wear cut-resistant gloves, remove exposed food, and clean the area carefully with a flashlight to find small shards. Discard food that may contain glass. Contact the manufacturer or retailer if a brand-new container fails during an approved use and you need warranty guidance.
FAQ
Can I put warm food in a glass container and freeze it?
Only after it has cooled substantially and the container’s instructions allow freezing. Very hot food can create uneven expansion and thermal shock. Cool the meal promptly, leave headspace, and refrigerate it briefly before freezing when possible.
How much space should I leave in a glass container?
Leave at least 1 inch above liquid-heavy food. For smaller containers, 10% to 15% empty space is a useful minimum. Foods with substantial water content may need more room, especially if the container narrows near the top.
Can I thaw a glass meal prep container in the microwave?
Only if the glass is microwave-safe and the manufacturer permits it. Remove or vent the lid, use short heating intervals, and stop if the glass is cracked or unusually hot in one area. Gradual refrigerator thawing is gentler.
Why did my container crack even though it was labeled freezer-safe?
“Freezer-safe” does not mean immune to thermal shock, overfilling, impact, or existing damage. The most common causes are insufficient headspace, freezing hot food, a sudden freezer-to-oven transition, stacking before freezing, or a small chip that weakened the glass.