Key takeaways
- Using hot water to speed thawing: Hot water can warm the outside of the glass much faster than the frozen center, increasing thermal-shock risk. Cold or lukewarm water is still not the preferred method for glass; use the refrigerator whenever possible.
- Putting frozen glass in a hot oven: The temperature difference may cause the dish to break suddenly. Only use an oven when the product instructions expressly allow it, and avoid moving the dish directly from the freezer to a preheated oven.
- Freezing a completely full container: Liquids and water-rich foods expand when frozen. Leave about 1/2 to 1 inch of headspace, or follow the container maker’s fill line.
- Stacking heavy containers on a frozen one: Pressure can stress glass, particularly around corners and rims.
- Using a tight lid during microwave heating: Steam needs a safe escape route. A sealed lid can bulge, pop off, or make the container difficult to handle.
- Assuming “glass” means oven-safe: A freezer-safe container may not be oven-safe. Check the markings and instructions for each specific product.
- Ignoring small damage: A tiny chip or scratch can become a break during heating, cooling, or handling.
Glass meal prep containers are convenient for freezing individual portions, but a frozen container can crack or shatter if it is exposed to a sudden temperature change. The safest approach is gradual thawing, gentle handling, and careful inspection before heating or eating. Moving a container directly from a freezer set around 0°F to a hot oven, microwave, sink of hot water, or warm countertop can create thermal shock. Even glass labeled freezer-safe may break if it is damaged, overfilled, or heated unevenly.
This guide explains how to unfreeze glass meal prep containers safely, whether you are thawing one serving for lunch or several dinners for the week. The same method works for common borosilicate or tempered glass food-storage containers, including 22- to 30-ounce sizes. Always follow the manufacturer’s instructions first, especially for lids, ovens, and microwaves.
As an Amazon Associate we earn from qualifying purchases at no extra cost to you. Product prices and availability are accurate as of the date shown and are subject to change.

What You Need
| Item | Why | Optional? |
|---|---|---|
| Refrigerator set to 40°F or below | Provides the slowest, most even thaw and keeps food out of the danger zone. | No |
| Rimmed tray or plate | Catches leaks if a lid loosens or the container develops a crack. | No, but strongly recommended |
| Oven mitts or dry kitchen towel | Protects your hands when moving a cold container or handling a warm one. | No for heated food |
| Food thermometer | Confirms that reheated food reaches 165°F in the center. | Yes |
| Microwave-safe cover or vented lid | Reduces splatter while allowing steam to escape. | Yes |
| Freezer-safe glass container | Designed to better tolerate freezing and thawing than ordinary glass. | No, if freezing food regularly |
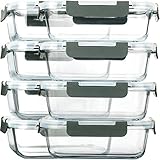
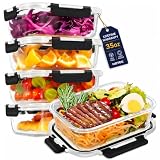
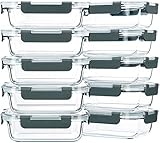
For replacing a damaged set, common 10-piece glass container assortments cost roughly $36 to $47, depending on capacity, lids, and retailer. For example, a 10-pack with 22-ounce containers may sell for about $36, while a 10-pack with 30-ounce containers may cost about $47. Capacity matters: leave more headspace in larger containers because soups, sauces, and cooked grains expand as they freeze.
Step-by-Step
-
Check the container and freezer temperature (1 to 2 minutes)
Before moving anything, confirm that the container is labeled freezer-safe. Look for chips, hairline cracks, cloudy scratches, or a lid that has warped. Do not thaw or heat a container that is visibly damaged. Place the freezer at approximately 0°F or colder for proper food storage, and keep the container level so frozen food does not press against one side.
-
Move it to a tray, then transfer it to the refrigerator (1 to 3 minutes)
Use both hands to lift the container. Avoid gripping it by the lid or dropping it onto a counter. Set it on a rimmed plate or tray and place it in the refrigerator, ideally on a lower shelf. Keep the lid on to prevent spills and contamination, but loosen it slightly if the manufacturer permits and the container is not likely to tip.
Do not place frozen glass on a heated surface, in a sink of hot water, or beside a stove. The refrigerator method is the safest because the container and its contents warm gradually rather than experiencing a rapid temperature swing.
-
Allow enough refrigerator thawing time (8 to 24 hours)
Small portions of about 10 to 16 ounces may thaw in 8 to 12 hours. A full 22- or 30-ounce container, especially one filled with dense food such as chili, rice, or casserole, may need 18 to 24 hours. Keep the refrigerator at 40°F or below, and use thawed food within 3 to 4 days.
Do not judge readiness by the surface alone. The middle may remain frozen while the edges are soft. If the food is still solid in the center after a night in the refrigerator, give it more time rather than forcing it loose with a knife or utensil.
-
Inspect the glass after thawing (30 seconds)
Remove the lid and examine the container under good light. Run a clean finger carefully along the rim, without pressing hard, and look for chips, cracks, sharp edges, or liquid that has seeped between layers of a damaged lid. If you see any defect, transfer the food to a different container or discard it if glass fragments may be present.
Never use a metal knife to pry frozen food from a glass container. The force can scratch the surface or create a weak point that fails during reheating.
-
Choose a gentle reheating method (5 to 15 minutes)
For stovetop reheating, transfer the thawed food to a saucepan rather than placing the glass container on a burner. For microwave reheating, remove any metal or non-microwave-safe lid and cover the dish with a vented microwave-safe cover. Heat at 50% to 70% power in 60- to 90-second intervals, stirring between intervals when possible.
Allow the container to sit for about 1 minute between microwave cycles. This gives heat time to spread through the food and reduces hot spots. Never microwave an empty glass container, a fully sealed container, or a container with a damaged lid. Do not use the oven unless the container specifically states that it is oven-safe and provides a temperature limit. Many glass food-storage containers are not intended for a preheated oven, broiler, toaster oven, or stovetop.
-
Confirm the food reaches a safe temperature (1 to 2 minutes)
Reheat leftovers to 165°F in the thickest or coolest part, checking with a food thermometer when practical. Stir soups, sauces, and casseroles before taking the temperature because microwaves heat unevenly. If the center is below 165°F, continue heating in short intervals.
-
Cool and store leftovers correctly (within 2 hours)
Eat the portion promptly, then refrigerate leftovers within 2 hours. If the room is above 90°F, refrigerate them within 1 hour. Do not seal a very hot container and immediately return it to the freezer; trapped steam can create excess condensation and affect food quality. Divide large amounts into shallow containers so they cool faster, and leave room for expansion if freezing them again.
Mistakes to Avoid
- Using hot water to speed thawing: Hot water can warm the outside of the glass much faster than the frozen center, increasing thermal-shock risk. Cold or lukewarm water is still not the preferred method for glass; use the refrigerator whenever possible.
- Putting frozen glass in a hot oven: The temperature difference may cause the dish to break suddenly. Only use an oven when the product instructions expressly allow it, and avoid moving the dish directly from the freezer to a preheated oven.
- Freezing a completely full container: Liquids and water-rich foods expand when frozen. Leave about 1/2 to 1 inch of headspace, or follow the container maker’s fill line.
- Stacking heavy containers on a frozen one: Pressure can stress glass, particularly around corners and rims.
- Using a tight lid during microwave heating: Steam needs a safe escape route. A sealed lid can bulge, pop off, or make the container difficult to handle.
- Assuming “glass” means oven-safe: A freezer-safe container may not be oven-safe. Check the markings and instructions for each specific product.
- Ignoring small damage: A tiny chip or scratch can become a break during heating, cooling, or handling.
How Often
You can safely thaw glass meal prep containers whenever needed; there is no fixed limit on the number of refrigerator thaw cycles. The important factors are the condition of the glass, proper headspace, and gradual temperature changes. Inspect containers before each freeze and after each thaw. Replace containers that develop chips, cracks, deep scratches, or rough edges.
For weekly meal prep, label each container with the food name and freezing date. Use older portions first, and avoid repeatedly freezing and thawing the same food because quality declines even when the glass remains intact.
When to Call a Pro or Replace
There is generally no repair for cracked or chipped food-storage glass. Replace the container if it has any visible crack, chip, sharp rim, deep scratch, discoloration that may hide damage, or a lid that no longer seals safely. Do not tape a crack, glue a broken corner, or continue using a damaged dish for dry storage.
Contact the manufacturer or retailer if a container breaks during normal use while following its written instructions. Photograph the damage, keep the product information, and note whether the dish was frozen, refrigerated, microwaved, or placed in an oven. If broken glass may have entered food, discard the entire portion rather than trying to strain it.
FAQ
Can I thaw a glass meal prep container on the counter?
It is safer to thaw it in the refrigerator. Counter thawing can leave food in the bacterial growth range, generally 40°F to 140°F, while the center is still frozen. It also provides less control over the glass temperature.
Can I put a frozen glass container in the microwave?
Only if the manufacturer specifically permits it. Even then, remove or vent the lid, use reduced power, and heat in short intervals. A refrigerator-thawed container is a safer starting point than one taken directly from the freezer.
How long can thawed meal prep food stay in the refrigerator?
Most cooked leftovers should be used within 3 to 4 days when refrigerated at 40°F or below. If the food smells unusual, looks slimy, or was left above 40°F for more than 2 hours, discard it.
What should I do if the glass cracks while thawing?
Do not touch food near the break or attempt to move it with bare hands. Put on sturdy gloves, keep children and pets away, and discard the food and damaged container together if fragments may be present. Clean the area carefully and inspect nearby surfaces for tiny shards.