
Key takeaways
- Best practice: lid off, plate on top, for the most even, mess-free heating.
- Quick option: lid cracked at one corner when you’re in a hurry.
Reheating is where a lot of meal prep goes wrong. Overheated edges, a cold center, a rubbery protein, or a lid that warps and stops sealing, these are the small failures that make people give up on prepped meals. But reheating well is a learnable skill, and it starts with understanding how your containers behave under heat.
This guide walks through microwave-safe reheating from start to finish: prepping the container, venting steam, arranging food for even heating, hitting safe internal temperatures, and knowing when to reach for glass instead of plastic. Master these steps and every prepped lunch comes out of the microwave tasting like you just cooked it.
Our top picks
![Freshware Meal Prep Containers [50 Pack] 1 Compartment Food Storage Containers with Lids, Bento Box, BPA Free, Stackable, Microwave/Dishwasher/Freezer Safe (16 oz)](https://m.media-amazon.com/images/I/41-CcCx-8JL._SL500_.jpg)
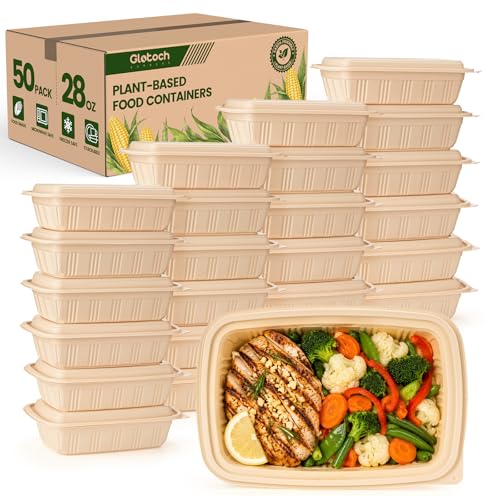

![[100% Eco-Friendly] 34 oz Disposable Food Containers with Lids – Sugarcane Pulp Take Out Containers, Biodegradable Lunch Box, Compostable and Microwave Safe To-Go Boxes for Meal Prep – Pack of 50](https://m.media-amazon.com/images/I/41+puIBBAoL._SL500_.jpg)

 Bentgo Prep
- Product Group: Kitchen
- Binding: Tools & Home Improvement
![WGCC Meal Prep Containers [38OZ] Plastic Food Storage Containers With Lids,10-Pack Reusable To Go Containers, Disposable Food Prep Container, BPA-free, Stackable, Microwave/Dishwasher/Freezer Safe](https://m.media-amazon.com/images/I/51+On5201wL._SL500_.jpg)
 50 Pack
- Product Group: Kitchen
- Binding: Tools & Home Improvement
As an Amazon Associate we earn from qualifying purchases at no extra cost to you. Ratings are shown as listed on Amazon.
⚡ Save on Your Next PC — Amazon Prime
Prime members get fast free shipping on the systems above, plus early access to Prime Day & Black Friday PC deals. New members get a 30-day free trial.
Watch: How to Use Your Meal Prep Containers for Reheating — Video Review
Check the Container Before You Heat
Not every container belongs in the microwave. Confirm a “microwave-safe” label before reheating. BPA-free plastic sets like the Bentgo Prep 1-compartment containers and sugarcane bowls such as the 34oz compostable set are made for it. Avoid anything with a metallic trim, and if a container is deeply scratched, cracked, or warped, transfer the food to a fresh one first.
Always Vent the Lid
Sealing a lid tight during reheating traps steam, which bulges the plastic and can cause the container to spit or the lid to pop. Crack one corner of the lid, set it loosely on top, or remove it entirely and cover with a microwave-safe plate. Venting lets steam escape while still holding in enough moisture to keep food from drying out.
- Best practice: lid off, plate on top, for the most even, mess-free heating.
- Quick option: lid cracked at one corner when you’re in a hurry.
Arrange Food for Even Heating
Microwaves heat unevenly, so how you arrange food matters. Spread it into an even layer rather than a tall mound, and push denser items like meat toward the outer edge where microwave energy is strongest, with quicker-heating items in the center. Stir or rotate halfway through, and heat in 60-90 second bursts rather than one long blast to avoid scorching the edges.
Hit a Safe Internal Temperature
Reheated leftovers should reach 165°F throughout to be safe, especially proteins and rice. A cheap instant-read thermometer takes the guesswork out. Heating at 60-70% power gives the heat time to spread to the center without overcooking the outside, which is the secret to a protein that’s hot all the way through but still tender.
Tips
- Add a splash of water or broth to rice and grains before reheating to restore moisture.
- Reheat delicate or crispy items separately so they don’t turn soggy alongside saucy food.
- Let the meal rest 30-60 seconds after heating so the temperature evens out.
- For hot, oily foods you reheat daily, switch to glass to spare plastic from wear.
Frequently Asked Questions
Can I microwave meal prep containers with the lid on?
Only if you vent it. Crack one corner or set the lid loosely on top so steam escapes. Sealing it fully traps pressure and can bulge or warp the lid.
What temperature should reheated food reach?
Reheat leftovers to 165°F throughout for safety. An instant-read thermometer is the reliable way to confirm the center is hot, not just the edges.
Why does my food heat unevenly?
Microwaves concentrate energy at the edges. Spread food into an even layer, put denser items on the outside, and stir or rotate halfway through for consistent results.
Is it better to reheat in plastic or glass?
Both work if labeled safe, but glass tolerates hot, oily foods better over time. For daily reheating of greasy dishes, glass lasts longer; plastic is fine for lighter, occasional use.
Conclusion
Good reheating is a routine: confirm the container is microwave-safe, vent the lid, spread food evenly, and heat at moderate power to 165°F. BPA-free sets like the Bentgo Prep containers handle daily reheating well, while glass is the upgrade for greasy dishes. Follow these steps and prepped meals reheat like fresh-cooked, which is the whole point of prepping in the first place.



Write Your Review
No reviews yet. Be the first to share your experience!