Key takeaways
- Sealing warm food: Steam and condensation weaken the seal and encourage large ice crystals.
- Using ordinary sandwich bags: They are not designed to block air or withstand long freezer storage.
- Overfilling: Food in the sealing channel can prevent a continuous bond.
- Ignoring sharp edges: Bones, pasta corners, and frozen vegetable stems can puncture the bag.
- Skipping the inspection: A vacuumed bag is not necessarily airtight if the seam has wrinkles or gaps.
- Storing food near the freezer door: Frequent temperature changes there can accelerate quality loss.
- Refreezing thawed food casually: Refreeze only when it has stayed safely refrigerated and has not been held at unsafe temperatures.
Vacuum sealing removes much of the air that causes ice crystals and dehydration, but it cannot rescue food that is warm, wet, poorly sealed, or left exposed to fluctuating temperatures. If you rush the process, trapped moisture can freeze into sharp crystals, a weak seal can admit air, and an overpacked freezer can create temperature swings. The result is freezer burn: gray-brown dry patches, tough edges, faded flavor, and a meal that may be safe but no longer enjoyable.
The good news is that preventing freezer burn in vacuum sealed meal prep is mostly a matter of portioning, chilling, sealing, labeling, and storing correctly. Use the following routine for meat, vegetables, grains, casseroles, and prepared meals throughout 2026.
As an Amazon Associate we earn from qualifying purchases at no extra cost to you. Product prices and availability are accurate as of the date shown and are subject to change.

What You Need
| Item | Why | Optional? |
|---|---|---|
| Vacuum sealer | Removes air and creates a tight heat seal. Basic models often cost about $30 to $60. | No |
| Freezer-rated vacuum bags or rolls | Thicker, textured bags are less likely to puncture and are designed for vacuum sealing. | No |
| Permanent marker and labels | Records the meal name, ingredients, portion size, and freeze date. | No |
| Sheet pan or flat freezer-safe container | Helps you freeze meals flat and prevents bags from bending while contents are still soft. | Yes |
| Paper towels | Wipes moisture from the bag opening so the seal bonds properly. | Yes |
| Freezer thermometer | Confirms that the freezer stays at 0°F or below, the recommended storage temperature. | Yes, but useful |
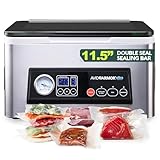
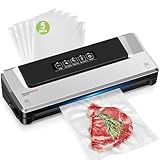
For a budget setup, the Bonsenkitchen Vacuum Sealer Machine, Multiple Modes For Meal Prep, Silver, is typically listed around $30 and offers basic modes for routine portions. A more automated option is the FRESKO Vacuum Sealer Machine with Automatic Bag Detection, Compact Design, which is commonly priced around $55. Either can work for meal prep when the bag, seal, and storage temperature are handled carefully. The machine does not replace freezer-rated bags or good food-safety practices.
Step-by-Step
1. Choose foods that freeze well (5 minutes)
Start with meals that contain moderate moisture and a stable texture. Cooked meat, shredded chicken, chili, soups, stews, blanched vegetables, rice, beans, and casseroles generally freeze well. Cream sauces, high-water produce, and delicate salad greens may separate or soften even when perfectly sealed.
Trim sharp bones and pointed edges from meat, or cover them with a small piece of freezer paper before bagging. Sharp edges can puncture the package during vacuuming or storage. Avoid sealing foods with exposed marinade pooling around the opening; liquid can be pulled into the sealer channel.
2. Portion and cool the food quickly (30 to 90 minutes)
Divide food into meal-size portions, usually 1 to 2 pounds per bag. Smaller, flatter portions freeze faster and are easier to thaw safely. Spread cooked food in shallow containers no deeper than about 2 inches, then refrigerate it promptly. Do not leave perishable food at room temperature for more than 2 hours, or more than 1 hour when the room is above 90°F.
Food should be thoroughly chilled before sealing. Warm food releases steam inside the package and can create moisture pockets, a poor seal, or bacterial growth before the meal freezes. For soups and sauces, chill them in the refrigerator first. You can also freeze liquid foods in a container until firm, then transfer the frozen portion to a vacuum bag.
3. Select the right bag size (3 minutes)
Cut a bag with enough room for the food and at least 3 inches of empty material above the portion. That space gives the sealer a clean area for the heat seal and leaves room to reseal after opening. For a 1-pound portion, a bag about 8 by 12 inches is often practical; larger portions may need a 10 by 13-inch or wider bag.
Keep food away from the top edge. Fold the bag’s opening back while filling it so grease, crumbs, and moisture do not contaminate the sealing area. Do not pack the bag so tightly that food reaches the side seams or prevents the contents from lying flat.
4. Remove excess moisture before sealing (5 to 10 minutes)
Pat meat and vegetables dry with paper towels. For saucy meals, use the sealer’s pulse or manual mode if available, stopping before liquid reaches the vacuum channel. Another reliable method is the pre-freeze technique: place the filled bag flat in the freezer for about 30 to 60 minutes, until the sauce is slushy or firm, then vacuum seal it.
With liquid-heavy meals, you can also place the bag inside a second freezer bag after sealing. The outer layer is not a substitute for a good vacuum seal, but it adds protection against punctures and temperature-related moisture loss.
5. Vacuum seal and inspect the seams (2 to 5 minutes)
Place the open end evenly in the sealer, following the machine’s fill-line guidance. Use a gentle or pulse setting for soft foods, and a normal setting for firm, dry portions. Keep the bag straight rather than twisted. After sealing, look for a continuous, smooth band across the entire opening. A seal with wrinkles, gaps, channels, or trapped food should be cut off and redone.
For extra protection, make a second seal about 1/4 to 1/2 inch above the first one. Do not leave less than about 1 inch between seals if you may need to cut the package open later. Press lightly around the package and watch for air returning; a bag that reinflates may have a puncture or incomplete seal.
6. Label and freeze flat (5 minutes)
Write the meal name, date, number of servings, and any thawing notes on the bag. A label such as “chicken curry, 2 servings, freeze March 2026” is more useful than a date alone. Lay the package flat on a sheet pan or freezer shelf with space around it. Once solid, stack flat packages vertically or horizontally like files.
Set the freezer to 0°F or below. Do not crowd the freezer with a large amount of warm food at once; add only what the appliance can freeze without a noticeable temperature rise. Leave room for cold air to circulate, particularly around the vents.
7. Thaw and handle safely (10 minutes to overnight)
Thaw vacuum sealed meals in the refrigerator, usually overnight for a 1- to 2-pound package. If the package is frozen solid, cut a small corner or open the bag before microwaving or reheating, according to the appliance instructions. Never thaw perishable food on the counter.
For best texture, use most vacuum sealed meals within 2 to 3 months, even though food kept continuously at 0°F can remain safe longer. Freezer burn becomes more likely as storage time increases, especially in a freezer that is opened frequently.
Mistakes to Avoid
- Sealing warm food: Steam and condensation weaken the seal and encourage large ice crystals.
- Using ordinary sandwich bags: They are not designed to block air or withstand long freezer storage.
- Overfilling: Food in the sealing channel can prevent a continuous bond.
- Ignoring sharp edges: Bones, pasta corners, and frozen vegetable stems can puncture the bag.
- Skipping the inspection: A vacuumed bag is not necessarily airtight if the seam has wrinkles or gaps.
- Storing food near the freezer door: Frequent temperature changes there can accelerate quality loss.
- Refreezing thawed food casually: Refreeze only when it has stayed safely refrigerated and has not been held at unsafe temperatures.
How Often
Inspect stored packages each time you reorganize the freezer, ideally once a month. Check for loose seals, swollen bags, tears, heavy frost, or labels that are becoming unreadable. Rotate older meals toward the front and use them first.
Clean the sealer’s drip tray and sealing area after any spill, and check the heating strip according to the manufacturer’s instructions. If you meal prep weekly, replace bags whenever the opening becomes too short for a clean second seal. Do not reuse a bag that held raw meat unless the manufacturer specifically rates it for reuse and it can be thoroughly cleaned.
When to Call a Pro or Replace
Call an appliance technician if your freezer cannot stay at 0°F or below, develops heavy frost on one wall, cycles continuously, or repeatedly warms food despite a clear door seal and clean vents. Those symptoms can indicate a thermostat, fan, gasket, or refrigerant problem.
Replace a vacuum sealer when it cannot create a vacuum, overheats during normal use, produces inconsistent seals after cleaning, or has a damaged cord or housing. Replace bags immediately if they are brittle, punctured, delaminating, or no longer form a smooth seam. Discard food with a broken seal, strong off odor, unusual color, or signs of thawing and refreezing rather than trying to reseal it.
FAQ
Does vacuum sealing completely prevent freezer burn?
No. It greatly reduces air exposure but does not eliminate it. Freezer burn can still occur from a pinhole, weak seal, long storage, temperature swings, or food pressed against an unprotected sharp edge. A second seal and an outer freezer bag can add protection.
Can I vacuum seal soup or other liquid meals?
Yes, but chill the soup first and use pulse mode, or pre-freeze it for 30 to 60 minutes before sealing. Keep liquid below the sealing area. If liquid reaches the machine’s vacuum channel, stop, wipe the bag opening completely dry, and start again with a fresh section of bag.
How much empty space should I leave in a vacuum bag?
Leave at least 3 inches between the food and the open edge. This provides enough material for a clean seal and a future reseal. Keep the top edge flat, dry, and free of crumbs or grease.
Is freezer-burned food safe to eat?
Freezer burn itself is a quality problem, not automatically a safety problem. You can trim severely dried areas if the food remained frozen and the package was intact. Discard it if it smells spoiled, feels slimy after thawing, has an unexplained color change, or was stored above safe temperatures.