Key takeaways
- 1½ pounds boneless, skinless chicken thighs or breasts
- 2 cups dry brown rice or quinoa, cooked according to the package directions
- 1 large broccoli crown, cut into florets
- 2 bell peppers, sliced
- 1 medium red onion, sliced
- 2 tablespoons olive oil
- Juice and zest of 1 lemon
- 2 teaspoons dried oregano, 1 teaspoon garlic powder, salt, and black pepper
- Optional: feta, parsley, hummus, or a yogurt-based sauce packed separately
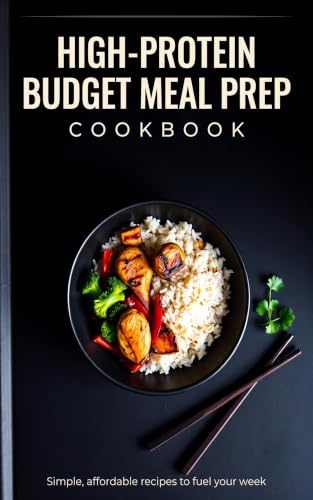
The most useful meal prep recipes are the ones that hold their texture for several days: sheet-pan chicken with roasted vegetables, turkey-and-bean chili, grain bowls, and overnight oats make a practical four-day rotation with one cooking session.
A simple four-day meal prep plan
This plan produces four lunches or dinners, four breakfasts, and several snack portions. Set aside about 2½ hours on a weekend, including cooling and packing time. Cooked food should be refrigerated promptly in shallow containers; use clean utensils when portioning and follow your local food-safety guidance.
| Recipe | Yield | Active time | Best storage window | Freezer suitability |
|---|---|---|---|---|
| Sheet-pan lemon chicken bowls | 4 portions | 25 minutes | Up to 4 days refrigerated | Chicken and vegetables: good; greens: add fresh |
| Turkey-and-bean chili | 6 portions | 20 minutes, plus simmering | Up to 4 days refrigerated | Good for about 2–3 months for best quality |
| Overnight oats with berries | 4 jars | 10 minutes | Up to 3 days refrigerated | Not recommended for best texture |
Recipe 1: Sheet-pan lemon chicken bowls
Yield: 4 servings. Per serving: approximately 5 ounces cooked chicken, ¾ cup cooked grain, and 1½ cups vegetables.
Ingredients
- 1½ pounds boneless, skinless chicken thighs or breasts
- 2 cups dry brown rice or quinoa, cooked according to the package directions
- 1 large broccoli crown, cut into florets
- 2 bell peppers, sliced
- 1 medium red onion, sliced
- 2 tablespoons olive oil
- Juice and zest of 1 lemon
- 2 teaspoons dried oregano, 1 teaspoon garlic powder, salt, and black pepper
- Optional: feta, parsley, hummus, or a yogurt-based sauce packed separately
Method and batch timeline
- Heat the oven to 425°F. Start the rice or quinoa first because it will need time to cook and cool.
- Toss the vegetables with half the oil and seasonings. Place them on a sheet pan and roast for 15 minutes.
- Coat the chicken with the remaining oil, lemon, oregano, garlic powder, salt, and pepper. Add it to the pan and roast until the thickest piece reaches 165°F, usually another 18–25 minutes depending on size.
- Rest the chicken for 5 minutes, then slice. Spread the cooked grain and vegetables on separate trays or plates for faster cooling.
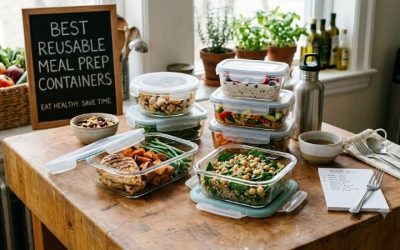
- Divide the grain, vegetables, and chicken among four containers. Keep sauce and crunchy toppings in small leak-resistant cups.
For better durability, roast vegetables until just tender rather than soft. Broccoli and peppers reheat well, while zucchini and leafy greens release more water and are better added on the day of eating. If using chicken breast, avoid overcooking; thighs generally remain more forgiving after reheating.
Recipe 2: Turkey-and-bean chili
Yield: 6 portions, approximately 1½ cups each. This is the strongest freezer option in the plan and can become three lunches plus three emergency dinners.
Ingredients
- 1 pound lean ground turkey
- 1 tablespoon olive oil
- 1 diced onion and 2 minced garlic cloves
- 2 diced bell peppers
- 2 cans beans, drained and rinsed
- 1 large can crushed tomatoes
- 2 tablespoons chili powder, 1 teaspoon ground cumin, and ½ teaspoon smoked paprika
- 1 cup low-sodium broth or water
- Optional: corn, lime, grated cheese, avocado, or chopped cilantro
Method
Brown the turkey in a large pot, then add onion, garlic, and peppers for 5–7 minutes. Stir in the spices, beans, tomatoes, and broth. Simmer uncovered for 25–35 minutes, stirring occasionally, until thick enough to mound slightly on a spoon. Cool in shallow containers before sealing.
Pack toppings separately. Chili can be refrigerated for the first several portions and frozen in the remainder. Leave at least ½ inch of headspace in rigid containers because the contents expand when frozen. Thaw in the refrigerator, then reheat until steaming hot, stirring halfway through.
Recipe 3: Overnight oats that do not turn watery
Yield: 4 breakfasts. Combine ½ cup rolled oats, ½ cup milk, ¼ cup plain yogurt, 1 tablespoon chia seeds, 1 teaspoon maple syrup, and a pinch of salt in each 12–16-ounce jar. Stir thoroughly, refrigerate overnight, and add berries or sliced banana before eating.
Make four jars at once, but keep the fruit separate if you prefer a firmer texture. Overnight oats generally have their best consistency within three days. Use rolled oats rather than quick oats, and do not substitute steel-cut oats unless the recipe is designed for them; they require a different liquid ratio and soaking time.
How to schedule one efficient prep session
| Time | Task | Why it works |
|---|---|---|
| 0:00–0:15 | Preheat oven, start grains, chop vegetables, mix oats | Long-cooking items begin first |
| 0:15–0:35 | Start chili and load vegetables into the oven | Two recipes cook at the same time |
| 0:35–1:05 | Add chicken to the sheet pan; finish chili | Use the waiting time for washing equipment |
| 1:05–1:35 | Cool food in shallow layers | Reduces condensation and sogginess |
| 1:35–2:00 | Portion, label, and refrigerate or freeze | Consistent portions simplify the week |
A practical worked calculation: four chicken bowls using 1½ pounds raw chicken produce roughly 20 ounces cooked chicken after moisture loss. Dividing by four gives about 5 ounces per container. If each bowl also contains ¾ cup cooked grain and 1½ cups vegetables, a 3–4 cup container provides useful room for mixing without crushing the food.
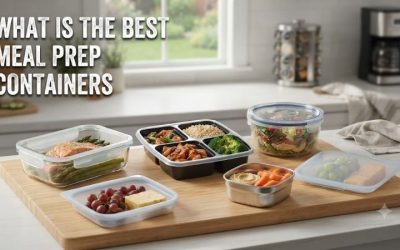
Choosing containers by situation
| Situation | Best container type | Useful specification | Trade-off |
|---|---|---|---|
| Frequent reheating at home | Borosilicate or tempered glass with a separate lid | 3–4 cup capacity; oven-safe base where stated | Heavier and breakable |
| Commuting or carrying several meals | Leak-resistant BPA-free plastic | 2–3 cup capacity; locking rim and removable gasket | Can stain and retain odors |
| Freezer portions | Rigid freezer-safe plastic or glass with headspace | 2–4 cup capacity; straight sides are easiest to empty | Glass needs careful temperature changes |
| Salads and toppings | Compartment box or small accessory cups | 1–2 cup main compartment plus 2–4-ounce cup | More pieces to wash |
Common real-world options include Pyrex glass storage sets for home reheating, Rubbermaid Brilliance containers for lighter packed lunches, and Snapware glass or plastic containers when interchangeable lids and stackability are priorities. Check the markings on the specific model rather than assuming every lid or base is oven-safe. Lids should generally be vented or removed before microwaving unless the manufacturer says otherwise.
Durability and ownership details that matter
- What wears first: silicone gaskets lose elasticity, locking tabs become loose, and plastic may discolor from tomato sauce or turmeric. Buy containers with replaceable lids or gaskets when available.
- Cleaning: rinse chili and sauces before they dry. Remove gaskets occasionally so residue does not collect beneath them. A dishwasher can shorten the life of some plastic lids, so use the upper rack and follow the product instructions.
- Temperature shock: do not move a hot glass dish directly into cold water or a freezer. Let it cool first, and never place a chilled glass container into a fully heated oven unless its instructions specifically permit it.
- Leak prevention: fill liquid meals below the sealing line, wipe the rim before closing, and transport upright inside an insulated lunch bag.
- Labeling: write the recipe and packing date on removable tape. Freeze individual portions flat or upright with headspace so they stack efficiently.
Storage guidance for better texture
Keep sauces, herbs, nuts, croutons, avocado, and fresh greens separate from moist foods. Store rice and other cooked grains in shallow containers rather than one deep pot. Refrigerate meals as soon as practical after cooking, and discard food that has developed an unusual smell, appearance, or texture. When in doubt about a particular ingredient or storage period, consult current guidance from a qualified food-safety authority.
The best weekly system is not the recipe with the fewest ingredients; it is the one you will repeat. Start with two recipes, four portions of each, and containers that match your commute, freezer space, and reheating routine. Once that system feels easy, add breakfasts or a freezer batch without increasing the number of cooking days.